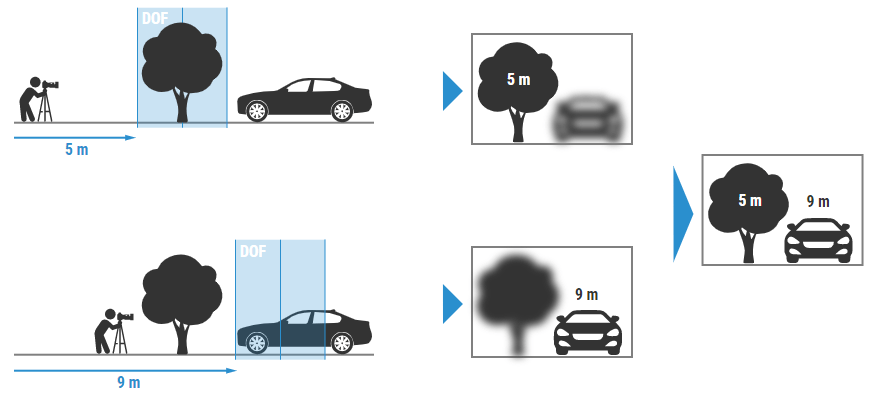
Focus-Variation combines the small depth of focus of an optical system with vertical scanning to provide topographical and color information from the variation of focus. The main component of the system is a precision optics containing various lens systems that can be equipped with different objectives, allowing measurements with different resolution.
With a beam splitting mirror, light emerging from a white light source is inserted into the optical path of the system and focused onto the specimen via the objective. Depending on the topography of the specimen, the light is reflected into several directions as soon as it hits the specimen via the objective. If the topography shows diffuse reflective properties, the light is reflected equally strong into each direction. In case of specular reflections, the light is scattered mainly into one direction. All rays emerging from the specimen and hitting the objective lens are bundled in the optics and gathered by a light sensitive sensor behind the beam splitting mirror. Due to the small depth of field of the optics only small regions of the object are sharply imaged. To perform a complete detection of the surface with full depth of field, the precision optic is moved vertically along the optical axis while continuously capturing data from the surface. This means that each region of the object is sharply focused. Algorithms convert the acquired sensor data into 3D information and a true color image with full depth of field. This is achieved by analyzing the variation of focus along the vertical axis.
In contrast to other optical techniques that are limited to coaxial illumination, the max. measurable slope angle is not only dependent on the numerical aperture of the objective. Focus-Variation can be used with a large range of different illumination sources (such as a ring light) which allows the measurement of slope angles exceeding 87°.
HOW FOCUS-VARIATION WORKS?
Basically, Focus-Variation is applicable to surfaces with a large range of different optical reflectance values. As the optical technique is very flexible in terms of using light, typical limitations such as measuring surfaces with strongly varying reflection properties even within the same field of view can be avoided. Specimen can vary from shiny to diffuse reflecting, from homogeneous to compound material and from smooth to rough surface properties. Focus-Variation overcomes the aspect of limited measurement capabilities in terms of reflectance by a combination of illumination, controlling the sensor parameters and integrated polarization. Modulated illumination means that the illumination intensity is not constant, but varying. The complex variation of the intensity can be generated by a signal generator. Through the constantly changing intensity far more information is gathered from the specimens´ surface.
In addition to the scanned height data, Focus-Variation also delivers a color image with full depth of field which is registered to the 3D points.
This provides an optical color image which eases measurements as far as the identification and localization of measurement fields or distinctive surface features are concerned. The visual correlation between the optical color image of the specimens´ surface and its depth information are often linked to each other and are therefore an essential aspect of meaningful 3D measurement. Since the described technique relies on analyzing the variation of focus it is only applicable to surfaces where the focus varies sufficiently during the vertical scanning process. Surfaces not fulfilling this requirement such as transparent specimen or components with only a small local roughness are hardly measurable.
Typically, Focus-Variation delivers repeatable measurement results for surfaces with a local Ra of 0.009 μm at a lc of 2 μm. Focus-Variation is used to perform high resolution 3D surface measurement for quality assurance in production as well as research and development activities in the lab. Key applications are surface analysis and characterization in e.g. tool & mold making, precision manufacturing, aerospace, automotive industry, all kinds of materials science, corrosion and tribology, electronics, medical device development. Due to its´ technical specifications the Focus-Variation technique is used for both form and roughness measurements.


